FREE FUN KART PLANS

 
Check the alignment of the brake hub assembly and tighten the set screw if everything is lined up properly.
   
Install the brake rod onto the brake pedal.  The brake rod is the longer of the two rods.  Slide the tinnerman nut onto the end of the rod.  We also drilled the end of the rod and installed a cotter pin to make sure it doesn't slip out of the pedal.  Connect a clevis to the threaded end of the brake rod and attach the clevis to the brake actuating arm using the clevis pin and cotter pin.
   
We installed a short brake rod/brake cable combination because we used a band brake instead of the 6" drum brake.
   
Install the throttle rod.  Install the return spring, nut, plastic cable insert, cable conduit, cable and wire stop as shown in the picture.
   
Install the chain guard and clutch onto the engine.  Install the engine onto the motor mount.  Leave the engine bolts loose so you can slide the engine forward and back.
   
Align the axle sprocket with the clutch.  Use a straight edge on the side of the axle sprocket and push the straight edge toward the clutch to check for perfect alignment.  Slide the sprocket/hub on the axle until it is aligned with the clutch.  Install the chain.  Key the sprocket hub to the axle and tighten the set screw in the hub using loctite.  Push the engine forward to take slack out of the chain and tighten the engine bolts.  You will want to leave a little slack in the chain so it is not too tight.
   
Setup the throttle cable to your engine.  We used a bolt and washer to clamp the conduit portion in place.  Then we threaded the cable wire through the hand throttle and secured the cable with a wire stop.  make sure you install a return spring on this side in addition to the return spring that is already installed on the throttle rod.
   
Second throttle return spring installed.
   
All four tires and tubes are the same.  Notice the difference between the front wheels and back wheels.  The front wheel halves have a 5/8" bore to fit the spindles and the rear wheel halves have a larger bore to fit the rear axle.  Also notice that four of the halves have a slot for the valve stem.  Start by placing an inner tube into a tire.  Place the wheel half that has the valve stem slot into the tire.  Flip the tire over and place the other wheel half into the tire.  Align the bolt holes, insert the four nuts and bolts and tighten.  Be sure not to over tighten.  Repeat this process for all four wheels.  Inflate the tires to 15psi which should seat the tire against the rim.  There should not be any gap between the tire and rim.

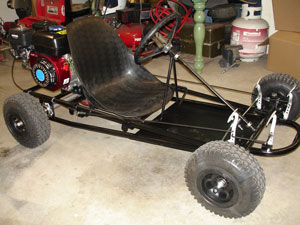
Slide a nylon bushing/spacer onto each spindle.  Slide the front wheels and tires onto the spindles.  Install another bushing/spacer onto the spindles.  Thread a lock nut onto the spindles and tighten.  Back the lock nut off just enough so the wheels will spin freely.  With the front wheels and tires installed you can setup the "toe in."  When measuring the spacing between the front tires, they should be 1/16" closer in the front than they are in the back.

   
Slide the rear wheels and tires onto the axle.  Notice the axle has a step in it.  The rear wheels will slide on with the larger bore first so the wheel can slip over the step in the axle.  Once the back wheels and tires are in place you can key them to the axle.  We place a little loctite on the key so it does not slip out.  Now thread lock nuts onto the ends of the axle and tighten securely against the wheels.
   
Bolt the seat brackets to the seat.  One bracket is wider than the other.  The wider seat bracket goes toward the rear of the kart.  keep the bolts loose until the seat is in place on the frame rails.
   
Slip the seat brackets over the frame rails.  Position the seat on the rails where you want it.  Use four nuts and bolts to clamp the seat brackets to the frame rails.  Tighten the seat bolts to the seat brackets.
   
Now check over you Azusa Fun Kart to make sure everything is tight and secure.  Spin the rear axle and make sure it spins freely.  Turn the steering wheel left and right to make sure the kart will steer properly.  Apply the brake several times to make sure it is operating properly.  Double and triple check everything before you or anyone else drives the kart.

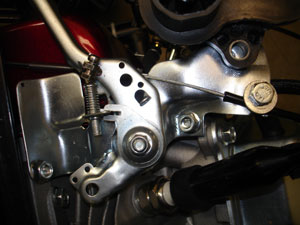
Safety should be the top priority when building a go kart.  Make sure drivers know how to properly use all of the controls.  Install a kill switch so the engine can be turned off in the event the throttle gets stuck open.  Make sure the driver can reach the brake pedal and depress the pedal with enough force to stop the kart.  Do not allow anyone to drive the go kart unless they are wearing proper safety gear including a helmet.

It's time to put fuel and oil in your engine and go for a test drive.  Be sure to test your brake several times before testing the top speed of your kart.

We hope you have found our free go kart plans useful.  Happy karting!


Back ]